How to configure syslog in IOS

Log messages are sent only to the console port by default, but can be redirected to a syslog server.

Switch(config)#logging host 172.16.0.19
Switch(config)#service timestamps log datetime msec

Syslog

Remember to have NTP configured before setting the logging. The service timestamps log datetime msec timestamps the logs, but of course this is no good if NTP hasn’t been set and the clock isn’t synchronized across the infrastructure.


Initial configuration of a switch or router

2016-01-20 18_40_03-Dokument1 - Word

priv


How to set a password on console ports

The console port is considered the primary terminal line and should be protected by a password.

Switch(config)#line console 0
Switch(config-line)#password console
Switch(config-line)#login

Executing the login command makes sure the console port will prompt you for authentication. You cannot use the login command without setting a password first or that line simply won’t be usable.

You can set a password on all console ports starting from line 0 – 16. Upon setting this password a prompt will appear at first connection.


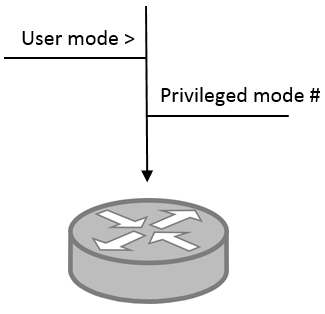
How to set a password on privileged mode

Switch(config)#Enable secret edCkdso!kdl


How to prevent console messages from disrupting your inputs

Switch(config)#line console 0
Switch(config-line)#logging synchronous

How to change or disable the console’s default timeout value from 10mins

Switch(config)#line console
Switch(config-line)#exec-timeout 0 0

The exec-timeout value is determined in seconds.


How to set a Telnet password

Telnet is referred to as the vty line in Cisco IOS.

First you have to see how many lines you have available. Routers usually have considerably more than switches, and then set the password for all lines possible.

Switch(config)#line vty 0 ?
<1-15> Last Line number
<cr>
Switch(config)#line vty 0 15
Switch(config-line)#password telnet
Switch(config-line)#login

Remember to always set the Telnet password in a production environment, but use a unique one as Telnet is not an encrypted line!


How to set a password on the auxiliary port of a router

First check how many lines you have and then set the password. For this I’ll showcase the login command functionality.

Router(config)#line aux ?
<0-0> First Line number
Router(config)#line aux 0
Router(config-line)#login
% Login disabled on line 0, until ‘password’ is set
Router(config-line)#password aux
Router(config-line)#login


How to set up Secure Shell (SSH)

A hostname and a domain name are needed for the encryption keys to be generated.

Switch(config)#hostname vlabdkcphsw001
vlabdkcphsw001(config)#ip domain-name itvlab.com
vlabdkcphsw001(config)#username mkbn password ssh
The name for the keys will be: vlabdkcphsw001.itvlab.com
Choose the size of the key modulus in the range of 360 to 2048 for your
General Purpose Keys. Choosing a key modulus greater than 512 may take a few minutes.

How many bits in the modulus [512]: 1024
% Generating 1024 bit RSA keys, keys will be non-exportable…[OK]

Vlabdkcphsw001(config)#
*mar 1 1:22:45.821: %SSH-5-ENABLED: SSH 1.99 has been enabled

Enable SSH version 2

vlabdkcphsw001(config)#ip ssh version 2

Configure the desired access protocols allowed on the vty line

vlabdkcphsw001(config)#line vty 0 15
vlabdkcphsw001(config-line)#transport input ?
all                         All protocols                                                                (NOT RECOMMENDED!)
none                    No protocols
ssh                       TCP/IP SSH protocol
telnet                  TCP/IP Telnet protocol

To allow SSH and Telnet at the same time type the following

vlabdkcphsw001(config-line)#transport input ssh telnet


How to encrypt the passwords from sh running-config

Every password but the secret password are visible from the sh running-config command by default. The way the encryption of the passwords work in the Cisco IOS is a little weird I think. You can use the service password-encryption to encrypt the passwords and then turn it off and they will still be encrypted.

vlabdkcphsw001(config)#service password-encryption

You can leave the service encryption ON, but this would take up processes. Use the show running-config command to first show that they have been encrypted.

vlabdkcphsw001#sh running-config

After you have verified the password encryption then you can turn off the encryption service.

vlabdkcphsw001(config)#no service password-encryption

If you execute the service encryption before setting the passwords then you don’t have to use the show running-config command. So in summary you cannot use the commands service password-encryption and no service password-encryption consecutively without the show running-config in between or your passwords won’t be encrypted!


How to turn off DNS

If you enter an IP address in privileged mode the switch or router will automatically assume you want to telnet by default. And if you type a name it will automatically try to resolve it through DNS.

So have you ever seen this?

Switch#mikkel
Translating “mikkel”…domain server (255.255.255.255)

% Unknown command or computer name, or unable to find computer address

This is because DNS is turned on by default, and you are forced to wait the timeout. To turn it off use the following command:

Switch(config)#no ip domain-lookup

vSphere DRS and HA

Turning on DRS (Distributed Resource Scheduler) in a new Cluster will add an additional option to choose from.

1

Automation Level has three options:

  • Manual

The DRS Cluster will suggest relocation of VMs but not execute them.

  • Partially Automated

DRS will locate a newly created VM based on work load, and will also do this at VM power ON, but not after. So the only automation here is when a VM is first created or powered ON. Afterwards it just acts like the manual setting.

  • Fully Automated

Fully automated makes the DRS move VMs around at all times, and an additional option comes with this setting which is;

  • Migration Threshold

Conservative is the result of a partially imbalanced cluster, and an aggressive is the result of trying to come as close to a balanced cluster as possible. Moving VMs around requires resources too, so a slightly conservative threshold might be recommend although best practice is to leave it at default.

Distributed Power Management is something that is not initially visible when first creating a cluster.

To enable this setting right-click your cluster -> Settings -> vSphere DRS and press Edit.

4

DPM works in conjunction with DRS to balance the load on as little resources as possible. DPM uses WOL, IPMI or iLO to wake up the host when its resources are needed. Be careful with this as in some cases hosts might shutdown and startup all the time, or a host might just not wake up when it is needed.

vSphere HA comes with the option Enable admission control, and you can set this setting if you want vSphere to prevent you from powering ON too many virtual machines that would eventually violate your cluster resources. So if you have two hosts and each of them could power 10 VMs, then you would not be able to power on more than 10 VMs because the cluster is going to reserve the other host for failover capability.

In the event that you do not enable admission control and over subscribe your resources then vSphere will still try to power up as many VMs as possible when you have a host failure, but there is no guarantee. You can use VM restart priority to boot up critical VMs first;

6

You have to decide whether high availability is more important than running as many VMs as possible when choosing admission control.

2

You can set the policy on admission control based on how many hosts your cluster can tolerate, or how big of a percentage you want to reserve for failover.

If you have a two node setup and set the Host failures cluster tolerates to 1 then that would be the same as reserving 50% of CPU and memory capacity for that particular setup.

The VM Monitoring Status comes with three options:

  • Disabled
  • VM monitoring only

VM monitoring only provides vSphere the ability to monitor VMware Tools and restart the VM on another host if VMware Tools becomes unavailable.

  • VM monitoring and application

If you set it to also monitor application you must set this in conjunction with a vendor. So this is vendor specific and will not work right out of the box.

Now the last setting is EVC.

3

EVC mode is for making hosts of the same CPU brand (Intel and AMD) compatible between models/generations so you can vMotion. Sometimes you may want to add additional hosts to an existing cluster but the model has gone out of production, and you can only get a newer model with a CPU with lots of new features. You would then turn on EVC and downgrade the cluster to the “worst” CPU to make them compatible and mask out all those new CPU features in the new model.

I usually think of Microsoft’s Domain and Forest Functional level where you downgrade the level to the lowest version of a domain controller you have. So if you have a 2003 and 2008 domain controller you would downgrade the functional level to 2003 in that forest.

If you edit vSphere HA you will see some additional settings not visible when set on a newly created cluster.

5

I touched base on the VM restart priority earlier, and this can be overwritten. The next one is the Host isolation response. So what would you like to do in the event that a host would become isolated and unable to actively migrate VMs while powered ON?

  • Leave powered on
  • Power off, then failover
  • Shut down, then failover

What is a Host isolation response?

Host isolation is when the management network of a host becomes unavailable. This can happen for many reasons, but this means you cannot move VMs around while they are powered ON. They will still run because they have access to the storage network as seen here;

8

To address this issue VMware introduced Datastore Heartbeating.

7

This will help prevent the status of a host isolation – a second layer defense.

How to create and mount an NFS datastore

NFS is not optimized for virtual machines just like VMFS is, but is still widely used by admins. It is the storage solution with the worst performance among iSCSI and FC. An NFS datastore has an unlimited size as opposed to VMFS which can hold a maximum of 2TB in vSphere 5.1 and 64TB in 5.5.

NFS Properties:

  • The file system on an NFS datastore is dictated by the NFS server.
  • NFS works like a fileshare.
  • No maximum size on an NFS datastore. This is dictated by the NFS server.
  • An NFS datastore can be used for both file and VM storage.
  • All the nitty vMotion and HA stuff is also supported on an NFS share just like VMFS.

I have used my Domain Controller as an NFS location. NFS is file based and not block based storage.

  • In the Server Manager dashboard go to Manage and select Add Roles and Features.

1


  • At the Server Roles page expand File and iSCSI Services and enable Server for NFS.

2


  • Press Add Features to enable NFS services on the server.

3


  • Continue and install the feature.

4


  • Create a folder on the server, right-click it and choose Properties.

5


  • Go to the NFS Sharing tab and select Manage NFS Sharing.

6


  • Enable Share this folder and then select Permissions.

7


  • From the drop-down menu in Type of access select Read-Write and then enable Allow root access. Without root access the ESXi host will not be able to reach the NFS share. Press OK.

8


  • Click Apply and then OK to exit.

9


  • Login to the vSphere Web client and go to vCenter -> Storage and right-click your Datacenter and go to All vCenter Actions -> New Datastore.

10


  • Click Next.

11


  • Select NFS and click Next.

12


  • Name the datastore appropriately and type the IP of the file storage followed by the name of the folder you created and then press Next.

13


  • Select the host(s) you’ll want the new NFS datastore to be visible to.

14


  • Review and press Finish to add the NFS datastore.

15


NFS datastore created and mounted.

16


Virtual switch security policies explained

2015-02-15 20_20_15-vlabdkcphvc01 - VMware Workstation

  1. Promiscuous mode

This mode allows the virtual adapter of a VM to observe traffic in the virtual switch, so any traffic coming from and to another VM can be observed. By default this is set to reject since that would pose a security risk, but there are situations where this is needed – for example by an IDS system (intrusion detection system) that needs to observe the traffic to inspect packages. Can be set at both the switch and port group.

  1. MAC address changes

MAC address changes are concerned with blocking traffic to a VM (incoming) if its initial and effective MAC address do not match.

  1. Forged Transmits

Forged Transmits are concerned with blocking traffic from a VM (outgoing) if its initial and effective MAC address do not match.

So if both forged transmits and MAC address changes are set to reject then no traffic will be allowed to and from the VM as long as its two MAC addresses do not match. If set to accept then no problem. MAC address can change when moved to another location. VMware recommends to set both to reject for the highest level of security possible. Although if a feature such as Microsoft Network Load Balancing (NLB) in a cluster set in unicast mode is needed the set both to accept. The default settings of a new standard virtual switch has both of these set to accept.

2015-02-15 20_06_41-MAC address change and forget transmits.vsdx - Visio Professional

Upload and install applications to a VM through vSphere

If you have some software you would like to install on a virtual machine, and one that does not have a network connection. You can then upload software to a VM through a datastore, but this can only be done if it has been converted to the ISO format.

  • An example: There are four applications you would like to install on a VM placed on your desktop. Compress all of these into a Compressed (zipped) folder.

1


  • Download and install the Zip2ISO You can also use other applications such as MagicISO or anything else you like. Drag and drop the compressed (zipped) folder into the Zip2ISO.

2


All applications will then be converted into a single image.

3


  • In the vSphere Web Client go to Home -> Storage -> Select a datastore -> Files and press the Upload

4


  • Navigate to the image you created with the Zip2ISO application and upload it. Once done you are now ready to utilize the image through the datastore you chose.
  • In the vSphere Web Client right-click a virtual machine and choose Edit Settings.
  • Use the drop-down window next to the CD/DVD drive 1 and choose Datastore ISO File.

5


  • Navigate and select the image you uploaded to the datastore. Also remember to put a checkmark in Connected otherwise the CD/DVD drive will not be connected to the VM.

6


  • Now simply open the CD/DVD drive in the virtual machine and your applications you converted will be there. It is recommended copying them to the desktop of the VM because the vSphere CD/DVD emulator can be slow to execute files.

7


How to migrate iSCSI storage from a standard switch to a distributed switch

This part makes up the end of my first post on this subject found here

Next up is migrating the iSCSI initiators. This can be done without downtime if I have spare NICs to work with. If not then I will have to disconnect the storage to get the NICs off the iSCSI adapters, and this will cause downtime.

I have spare NICs to work with so I will migrate the iSCSI storage without downtime.

So remember that my storage network has two NICs utilized to enable failover capability. For this reason I can safely remove one NIC.

1


  • I will jump back into the vSphere client for a moment to do this. Select a host in vCenter and go to Configuration -> Storage Adapters and right-click the iSCSI Software Adapter and select Properties.

2


  • Select a vmkernel adapter and press Remove and then Close. vSphere wants to rescan the adapters after this.

3


  • Next go into Properties of the virtual switch with the iSCSI initiators.

4


  • Remove the iSCSI initiator you removed off the iSCSI software adapter. Do not mind the warning as long as you remove the appropriate initiator.

5


  • Remove the appropriate NIC from the switch.

6


  • So now the storage switch will have only one active NIC left, and I just killed the high availability setup. This is also why there is an exclamation mark at the host in vCenter because it lost its uplink network redundancy. Do this for all hosts.

7


  • So back in the vSphere web client I now have two available NICs to use. They have not been assigned to any switches yet.

8


  • So I have already prepared the distributed switch with two vmkernel adapters (iSCSI initiator 1 and 2). Now press the Add Hosts

9


  • Add both hosts to the switch and on the Select network adapter tasks page select Manage physical adapters.

10


  • Assign each of the two free NICs to each its own uplink on both hosts.

11


  • Go to Edit on iSCSI-initiator 1.

12


  • On the Teaming and failover page make Uplink 1 as the only active uplink, and move the rest to the Unused It is very important to move them to unused and not standby otherwise it will not work as iSCSI cannot utilize two NICs in the same vmkernel at the same time. This way the vmkernels becomes iSCSI compliant.

13


  • Do the same for iSCSI-initiator 2 but this time make Uplink 2 the only active adapter and move the rest to Unused.

14


  • In Hosts and Clusters select a host and go to Manage -> NetworkingVirtual Switches and press the Add host networking

15


  • Select VMkernel Network Adapter and press Next.

16


  • Select Select an existing distributed port group and press Browse.

17


  • Select the first iSCSI initiator and press OK.

18


  • Leave everything at default on the 3a Port properties

19


  • Select Use static IPv4 settings and type an IP address and a subnet mask and press Next.

21


  • Do this for both iSCSI adapters on both ESXi hosts. Check below for what it should look like on one host.

22


  • Now go to Hosts and Clusters and select a host and go to Manage -> Storage -> Storage Adapters and select the iSCSI Software Adapter. Go to Network Port Binding and press the Add.

23


  • Add both iSCSI initiators to the binding port group.

24


  • So it will look like this;

25


  • Do this for the second host as well and remember to rescan the iSCSI adapter on both hosts and it will eventually look like this;

26


  • You can now safely remove the iSCSI port binding from the standard switch.

27


  • And you can safely remove the iSCSI vmkernel port and associated NIC.

28


So the essential part of “migrating” the iSCSI connections from a standard switch to a distributed switch is to make sure other vmkernel port bindings are available to the network port binding on the iSCSI network adapter. So it isn’t really a migration per say but rather an exchange of vmkernels and physical network adapters.

29

How to migrate vSS to vDS

I created a vSphere network based on standard switches. I put everything in the network including management, storage, VM network, vMotion and I made everything possible to failover to a second NIC to come as close to a production setup as possible.

I played around with the design and configuration of the migration into the vDS for a few days. At a CBT nugget video Greg Shields demonstrates how he leaves one NIC to remain out of two in a redundant management standard switch when he migrates the vSS into vDS. The purpose of this was to keep a backup. However, from my own investigation it is not necessary to leave anything behind when migrating for several reasons.

  1. The vmkernel is migrated – as in moved – from the standard switch to the distributed switch, and the vSS is thus rendered useless unless you manually create a new vmkernel for it. Also, you cannot utilize two vmkernels for management in a standard and distributed switch respectively at the same time either.
  2. Even if vCenter goes down and the management of the vDS is not possible then everything will still run fine as vSphere actually creates the standard switches invisibly for you in the background. Source:  VMware vSphere: Networking – Distributed Virtual Switch

Before this realization I used Greg’s method and tried to leave one NIC to remain in the standard switch. This failed at first because I migrated the standby NIC, and left the active NIC hanging with no vmkernel in the switch (and because I forgot to tag the standby nic as a management adapter in the DCUI). Upon rolling back (vSphere does this automatically) vSphere set every single NIC in my environment to standby and none of my hosts could connect to vCenter (bug maybe?).

So, for the networking designs I have done so far I have always separated everything into each its own switch, and as thus haven’t felt the need to utilize VLAN tagging inside the virtual standard switches, but only on the back-end switches. At first I migrated every single standard switch into a single vDS and utilized VLAN tagging in the vDS to separate the traffic, but this failed seemingly due to not having the back-end networking prepared at my hands.

So for this demonstration I will make an exact replica of my standard switch design, and then migrate everything into the distributed switches.

Because of the web client’s lack of option to show the complete network I used the C# client for that.

1


  • First create a distributed switch. On the web client’s homepage select vCenter -> Networking. Right-click the Datacenter and select New Distributed Switch.

2


  • I have named the first distributed switch dMangement and selected the newest distributed switch version available. On the Edit settings page select the amount of uplinks in the distributed you want. Unselect Create a default port group.

Note: The number of uplinks you specify should be the maximum number of uplinks one single ESXi host can contribute with to a single vDS. Think of uplinks as the slots available for an ESXi’s NICs to plug in to. Each of my two ESXi hosts have 8 physical network interface cards installed, so I should set 8 if I wish to migrate all port groups into the same switch. However, since I will create a distributed switch per port group I only need to specify to. The number of uplinks can also be changed after deployment.

3


  • Select the new switch and create a new distributed port group.

4


  • Name the new port group for Management and press Next.

5


  • Leave everything at default and press Next and then Finish to create the port group.

4

  • Next press the Add hosts

5


  • Select Add hosts and press Next.

6


  • Press the New hosts icon and add the hosts you wish to add the new distributed switch to.

7


  • Select both Manage physical adapters and Manage VMkernel adapters and press Next.

8


  • Select the first vmnic that belongs to the management vmkernel adapter and press Assign uplink.

9


  • Assign vmnic0 to uplink 1 in the distributed switch and then assign vmnic1 to uplink 2.

10


  • So for both ESXi hosts it will look like this:

11


  • On the next page select the vmkernel adapter vmk0 and press Assign port group.

12


  • Since by my design there will only be “one port group per switch” there is only one to select.

13


  • So it is pretty straight forward. Make sure both vmkernels from each ESXi host becomes reassigned from the standard switch to the new vmkernel port group on the new distributed switch and press Next.

14


  • No impact on iSCSI since I will not touch this yet. Click Next and then Finish to migrate the vmkernel and the physical NICs.

15


  • So once migration is done you will be able to see that the vmkernel has been removed from the standard switch (vSS), so leaving a NIC as backup serves no purpose.

16


  • Exact same steps are made with vMotion vmkernel adapters, so moving forward to migrating virtual machines create a new distributed switch. Remember you could also just create a new port group but then I would have to separate traffic with VLAN tagging, and I like to keep things simple and easy.

17


  • Assign two uplink ports to the new distributed switch, and it actually makes more sense to enable Network I/O Control in this scenario than utilizing it on a management network I just didn’t think about that when I created the vDS for the management network the first time.

18


  • Press the Add hosts icon again.

19


  • Select Add hosts and press Next.

6


  • Press the New hosts icon and add the hosts you wish to add the new distributed switch to.

7


  • This time around select Manage physical adapters and Migrate virtual machine networking and press Next.

20


  • Assign the vmnics that belongs to the VM port group to each its own uplink in the new distributed switch.

21


  • On the Migrate VM networking select the VMs to migrate and press Assign port group.

22


  • Select the one and only available distributed port group.

23


  • Make sure all virtual machines are migrated to the new port group and press Next and then Finish on the following page to migrate.

24


  • Virtual machines successfully migrated but notice that the port group has remained in the vSS.

25

Next up is migrating the iSCSI connections.