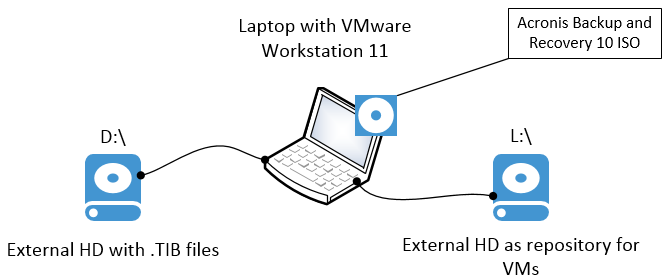
First create a bootable ISO with Acronis Backup and Recovery. Acronis Backup and Recovery 10 was used for this guide. It should also be possible to use Acronis’ newer version of bootable restore with Acronis Universal Restore.
You will also need a copy of VMware Workstation and create and use a virtual machine to boot the Acronis Backup and Recovery 10 ISO on.
It was possible to convert .TIB to .VHD In Acronis True Image Backup 2014 and below, but that feature was removed in version 2015.
- In VMware Workstation create a new custom virtual machine.
If you have VMware Workstation 11 and select typical the hardware version will be 10, and such a VM can only be edited from an ESXi 5.5 managed through a vCenter with the Web Client installed. Therefore do not select typical.
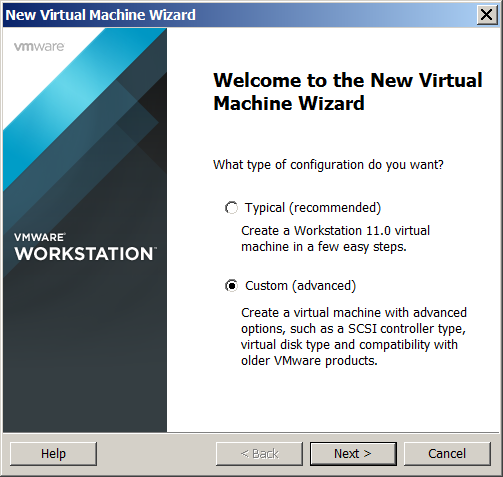
- Select Workstation 8.

- Mount the Acronis ISO image.

- Select Other as the operating system and version.

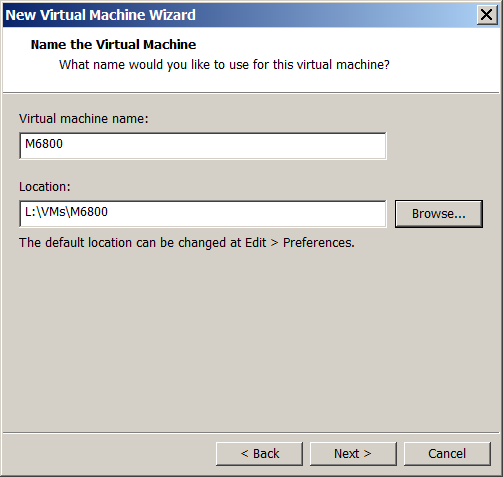
- Choose a VM name and location.
- Fast forward to the final VM settings select Customize Hardware.
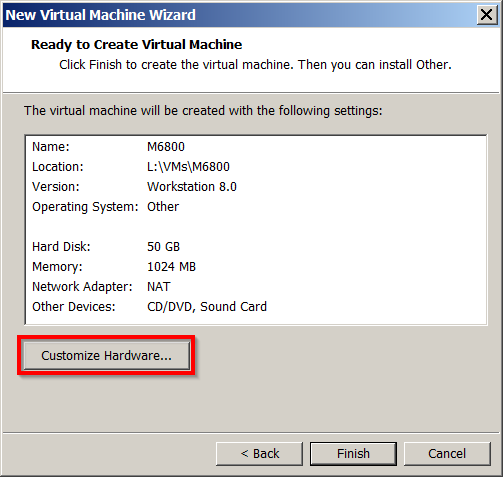
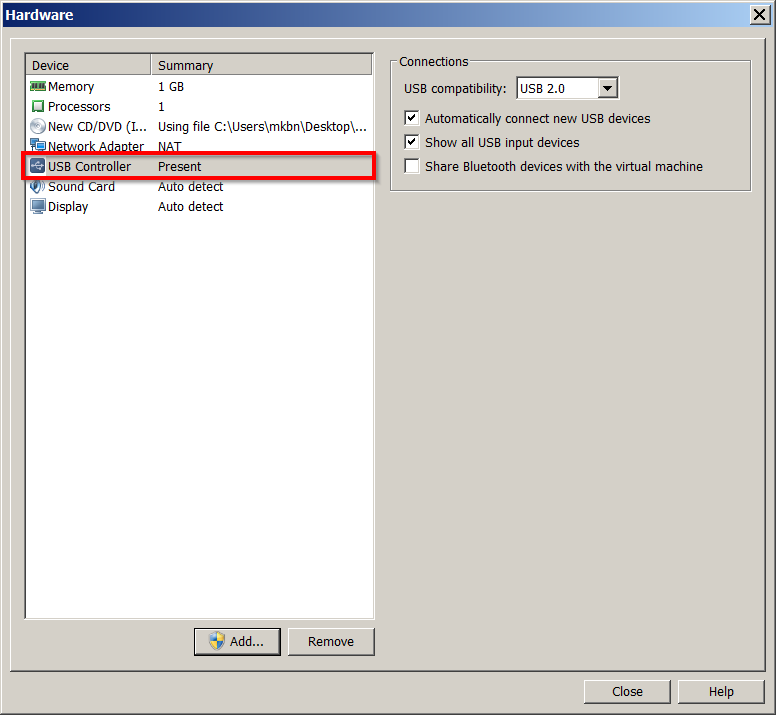
- Add a USB Controller to the VM. You want this so you can connect the external HD with the .TIB files on to the new VM.
- Turn on the new VM and let it boot on Acronis B&R 10 ISO.
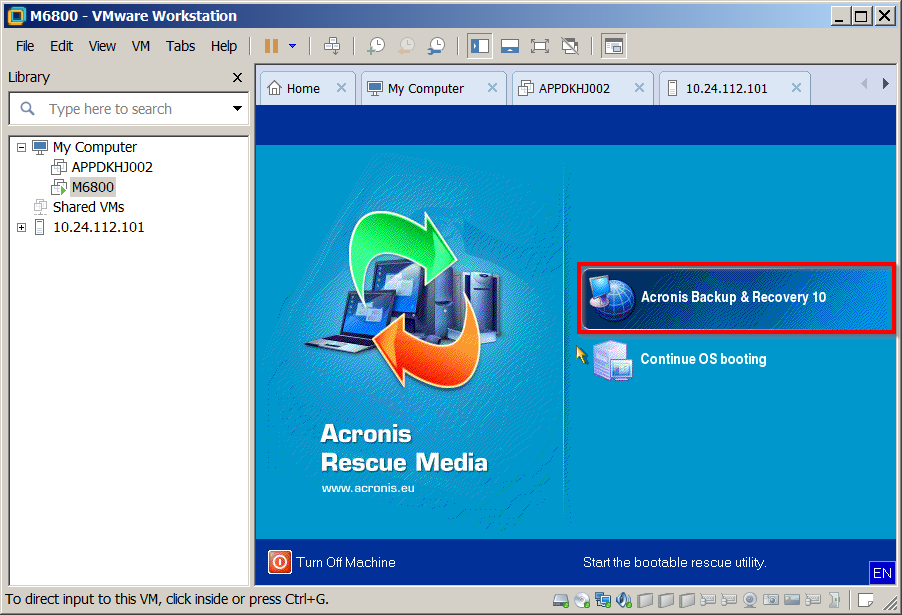
- Select Run management console.

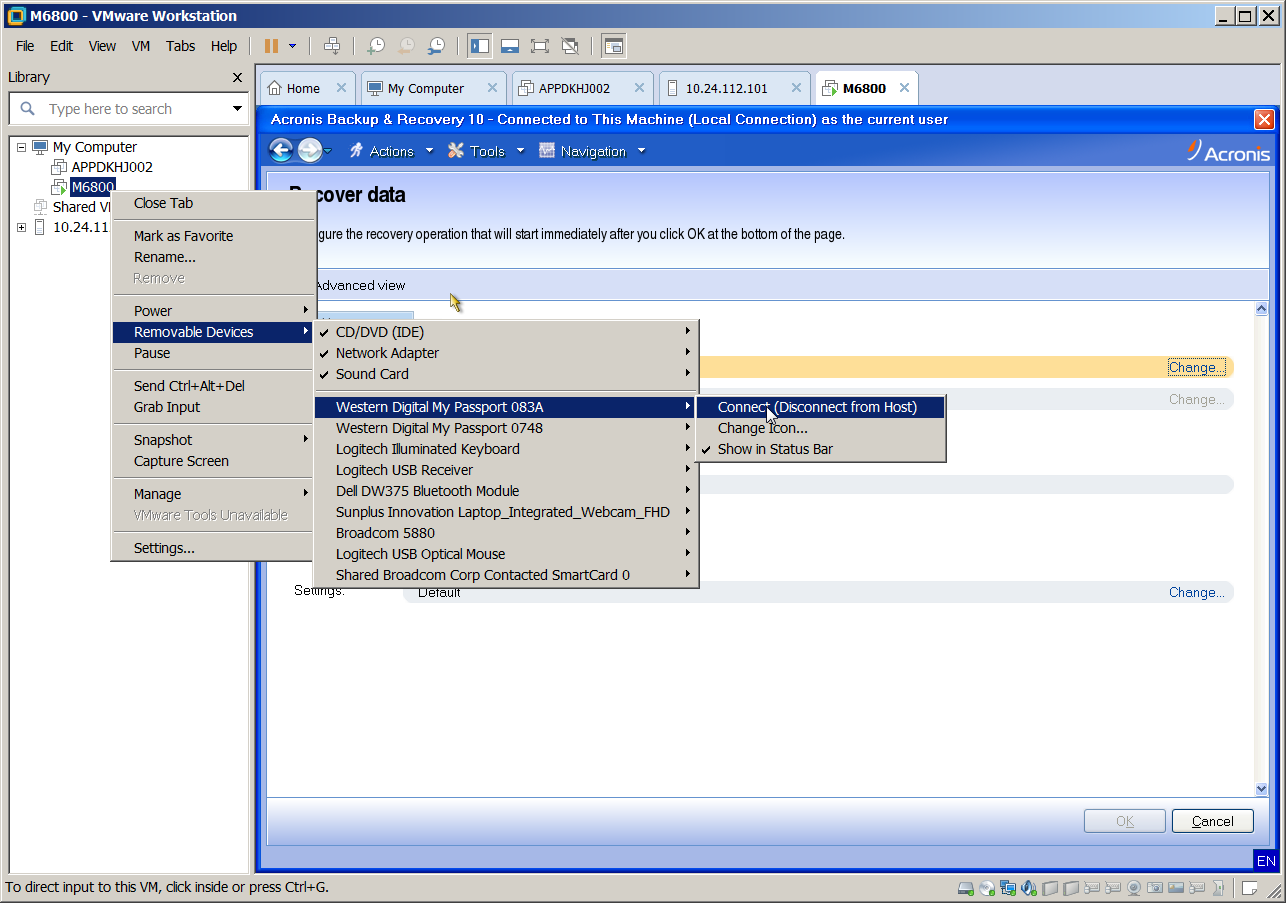
- Select Recover.

- Right-click the new VM in Workstation and go to Removable Devices > Select USB with .TIB files on > Connect (Disconnect from Host).
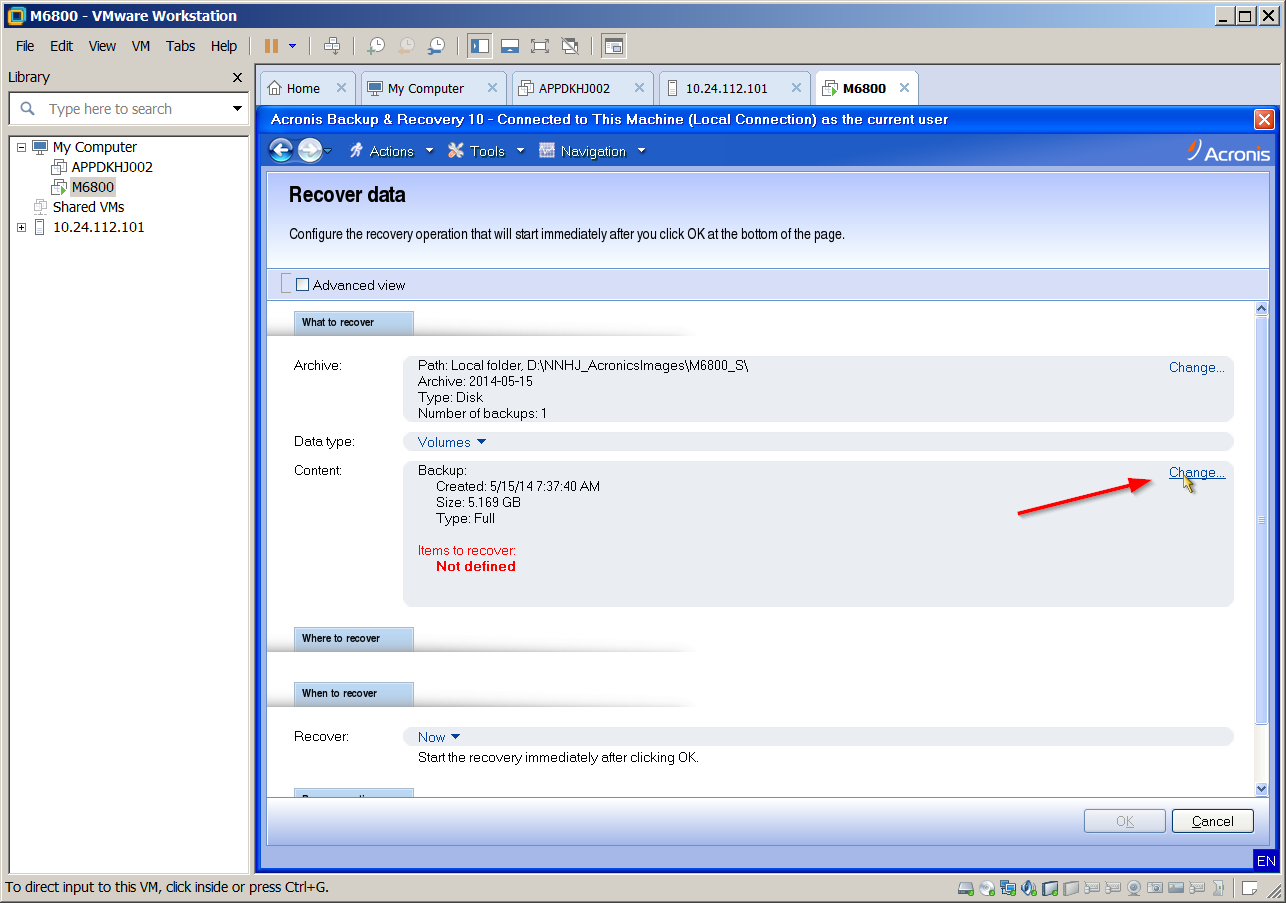
- Press Change.
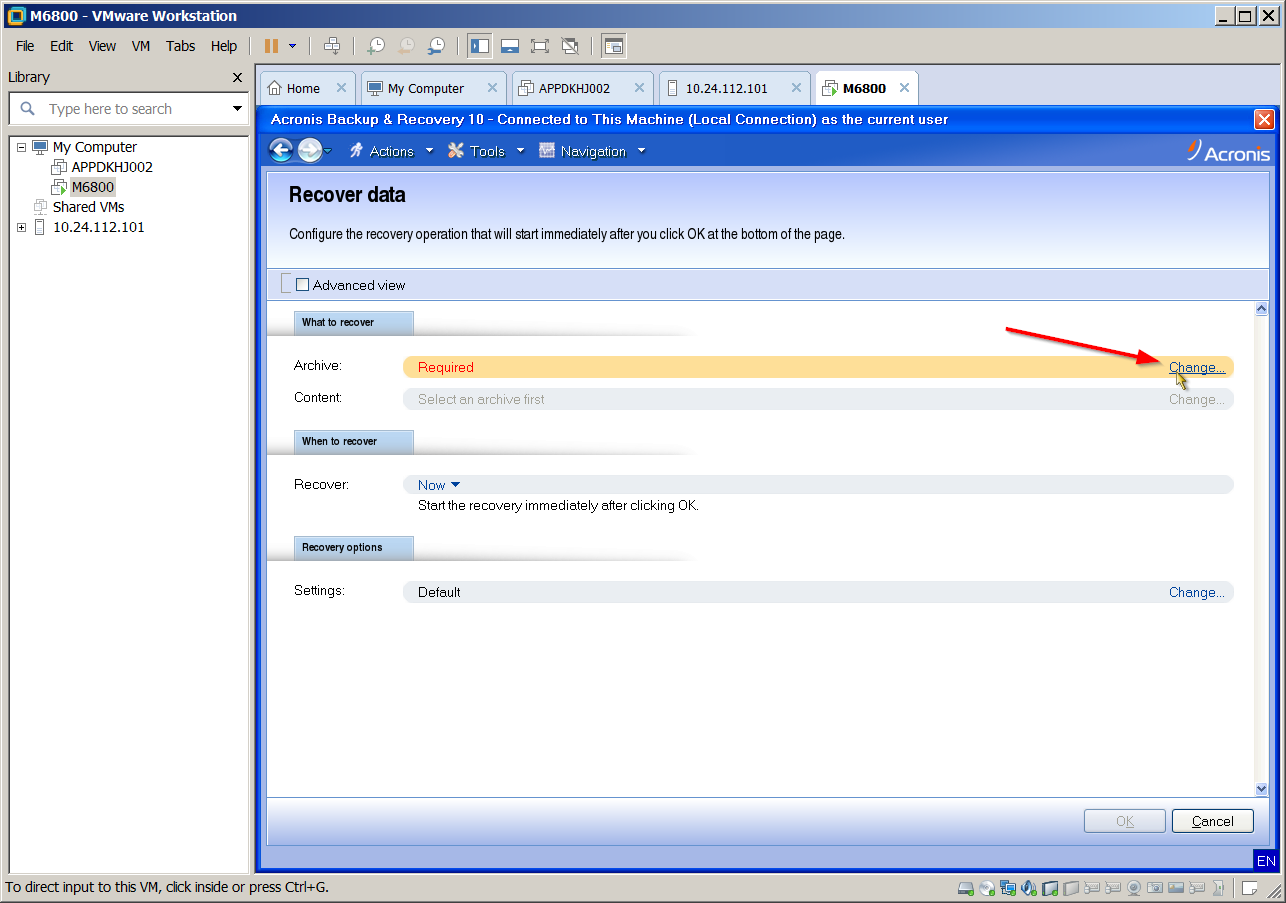
- Navigate to the .tib file desired to be restored.

- Press change to select the data to be restored.
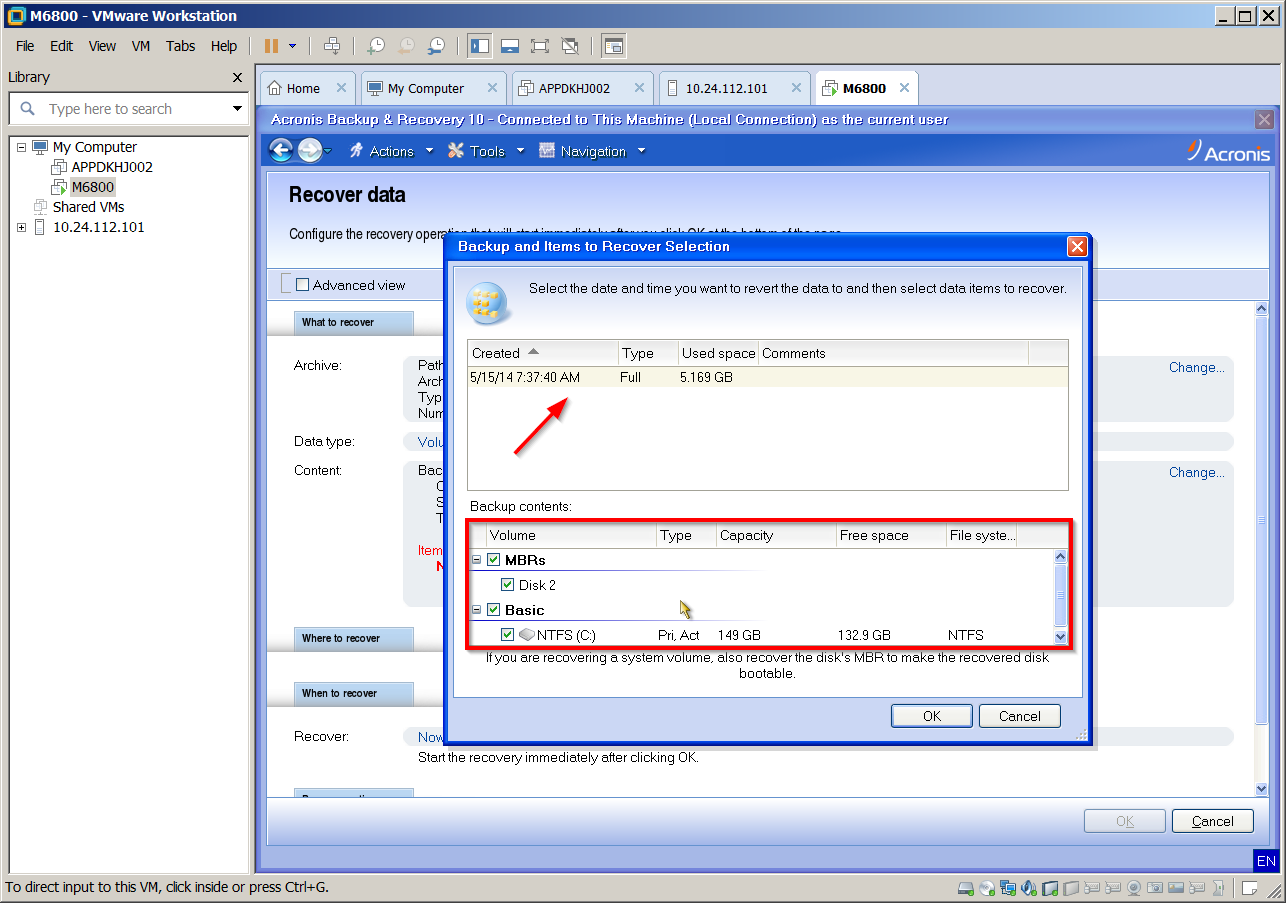
- Select the data from the .tib file to be restored.
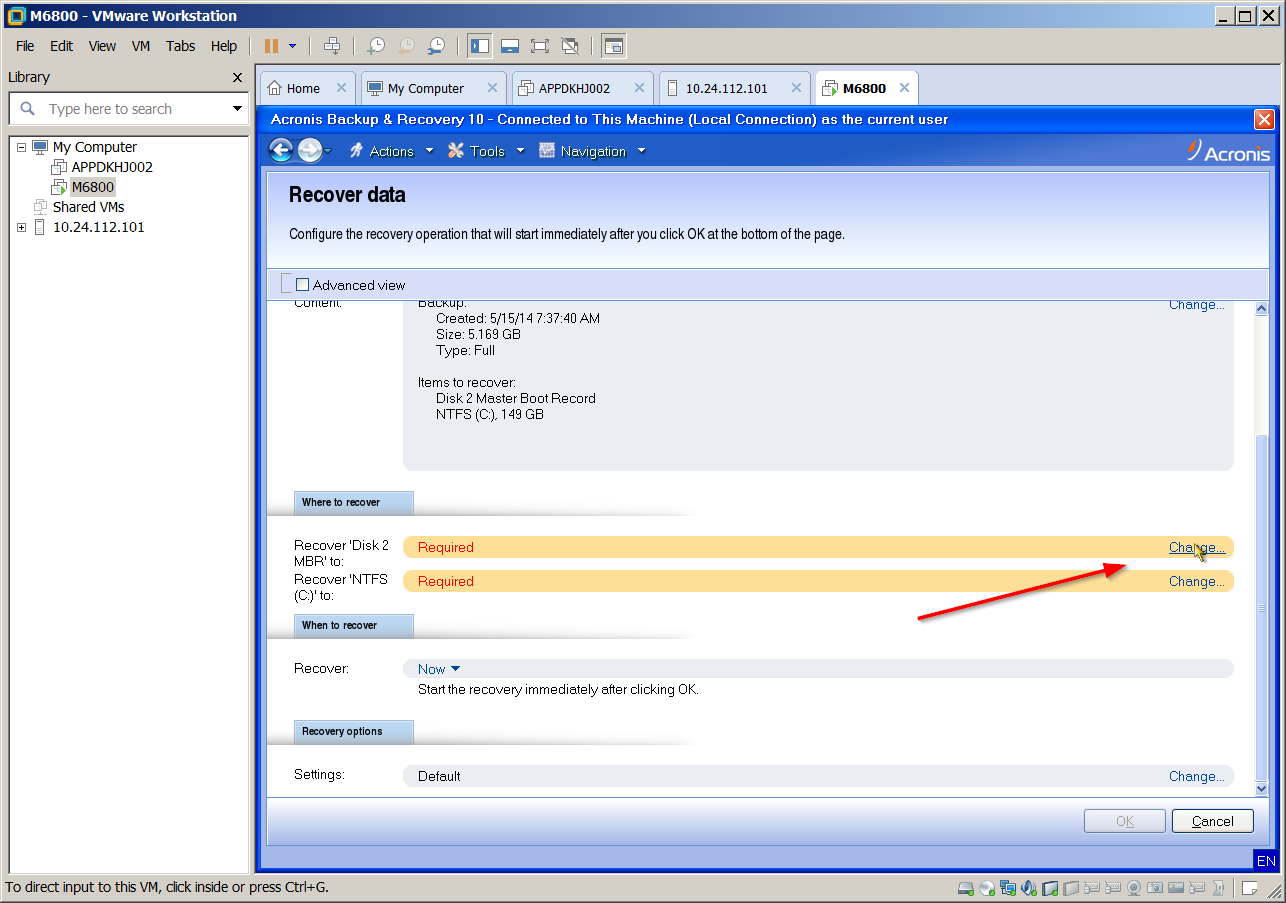
- Press change to select where to recover the data to.
- Press OK to start the restore.

Once done simply reboot the VM and hope it doesn’t BSOD 🙂
